By Lindy Van Schalkwyk, last updated on December 16, 2022
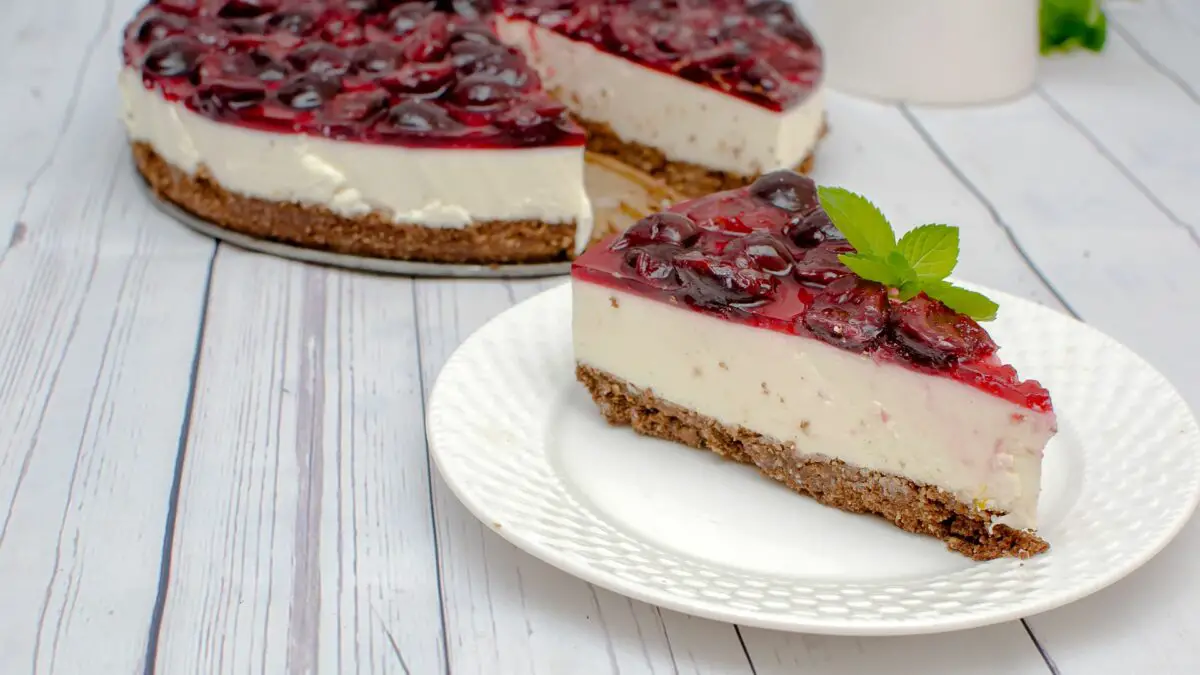
Our Keebler no-bake cheesecake is stuffed with authentic cherry flavors. Once it’s set in the Keebler crust, you can finish it off with whipped cream.
This recipe only takes about 15-20 minutes to put together. And most of the time is spent waiting for it to set in the fridge. But, once it’s ready, don’t expect it to last very long! It’ll be gone quicker than you took to make it – it’s that good!
What Goes Into Our Homemade No-Bake Cheesecake, Keebler Edition?
The reason we developed this cherry Keebler no-bake cheesecake is for two reasons: to be a quick no-bake cheesecake option and to be incredibly easy.
And if we must say so ourselves, we outdid it this time!
This no-bake cheesecake is made easy primarily by the Keebler ready-to-use no-bake pie crust. It is made from graham crackers, so can be seamlessly used as a pie crust for a cheesecake.
Then, all that is left for you to make is the filling. Now, we’ve decided to skip the classic cherry topping that most of these types of cheesecakes have. Instead, we will incorporate the topping directly into the vanilla cheesecake batter.

This will help add an intense fresh cherry flavor and even some textured pieces. But, if you don’t like the idea of cherry chunks in your creamy cheesecake, just blend and whisk everything together.
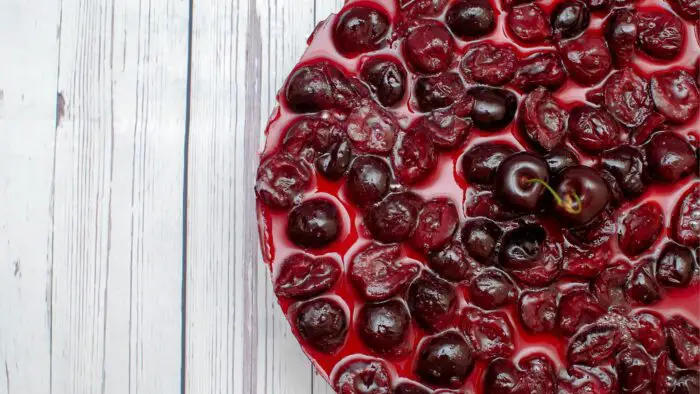
And finally, this simple, rich, and uber-silky cheesecake can be topped off with fresh whipped cream and fresh whole cherries.
It’s easy, fun, and delicious. Now, read on to learn exactly how we make this Keebler no-bake cheesecake in under 20 minutes.
What You Need To Make This Cherry Keebler No-Bake Cheesecake
Ingredients for the Keebler no-bake cheesecake
- 1 Keebler Ready Crust, Graham Crackers
- 2 pounds of fresh cherries, pitted and roughly chopped
- 8 ounces full-fat cream cheese, softened at room temperature
- 1/2 cup caster sugar
- 8 ounces Cool Whip, softened at room temperature
- 1/2 teaspoon vanilla extract
- Whipped cream, for garnish
- Fresh whole cherries, for garnish
Equipment
- 10-inch springform cake pan
- Measuring cups and spoons
- Mixing bowls
- Blender
- Strainer or sieve, fine-meshed
- Electric or hand mixer
- Rubber or silicone spatula
- Plastic or saran wrap
Step by step instructions
Step 1: Prepare the equipment and crust
First, place the Keebler pie crust inside the fridge. If it was frozen, make sure it is completely thawed.
You should also ensure that all of the ingredients are completely softened to room temperature. This helps them create a much smoother lump-free cheesecake batter.
Step 2: Make the cherry filling
Make sure that all of the cherries are washed, pitted, and roughly chopped. Set aside about 1 3/4 cups of chopped cherries.
The rest of the chopped cherries can be placed inside a blender for a couple of seconds. Once the cherries are completely pureed.
Strain the blended cherry liquid and press it to extract as much pure cherry juice as you can. Discard any leftover fibers in the sieve. Set the fresh cherry juice aside until needed.
Step 3: Make the vanilla cheesecake batter
Place the softened cream cheese inside a large mixing bowl. Then, beat it until it is completely smooth in texture.
Then, add the caster sugar and keep beating the cream cheese. This will take about 4-5 minutes at medium-high speed to help dissolve the sugar.
Then, by hand, whisk in the cherry juice you just made. If you use an electric blender, the mixture may separate or cause a big mess. Once the cherry juice has been added, add the chopped cherries, Cool Whip, and vanilla extract.
Fold in the remaining ingredients until you have a completely smooth and uniform batter for your Keebler no-bake cheesecake.
Step 4: Assemble and set the cheesecake
Finally, gently pour the cherry cheesecake batter into your Keebler no-bake pie crust. Smooth out the top and ensure there are no big air pockets.
Wrap the entire cheesecake in plastic or saran wrap. Then, place it inside the fridge and allow it to set for at least 6 hours. We always recommend that you leave it to set overnight (about 8-10 hours).
Step 5: Garnish the cherry-flavored Keebler no-bake cheesecake
Once your cherry cheesecake has completely set inside the fridge, you can remove it. Take it out of the aluminum foil crust container if you want to and place it on a cake stand.
And lastly, garnish the cherry cheesecake with freshly whipped dollops of piped whipped cream and fresh cherries.
Serve immediately or store in an airtight container for 4-5 days.
Expert Tips And Tricks
- To turn this Keebler no-bake cheesecake into a Keebler mini no-bake cheesecake recipe, all you have to do is change the portion size. You can buy the Mini Graham Cracker Pie Crust from Keebler. You will most likely need between 2-4 boxes if you want to make the entire recipe. However, you can always store any leftover mini crusts.
- You can tell that a no-bake cheesecake has completely set when it is firm. Sound obvious enough, right? But unlike baked cheesecakes, these don’t jiggle. They should have a dense and firm texture that doesn’t have any liquid oozing out.
- If you cannot find fresh cherries, your next best option is to use frozen ones. Make sure they are completely thawed before adding them into the batter as chopped pieces.
- We don’t recommend using maraschino cherries for this recipe. You can, but you will need to make a few changes to the recipe. First, you’ll need to reduce the amount of sugar to almost nothing. The sweet syrup from the maraschino cherries will be more than enough. And keep in mind, the blended and strained liquid from these cherries will turn your cheesecake pink (-er than fresh cherries).
- You can have a look on our website for some cherry toppings you can try. We don’t think this recipe needs any more cherry flavors. But, if you’re looking for something to do with leftover fresh cherries, there will be some ideas for you.
Preparations Times And Servings
| Preparation Time | Setting Time | Servings |
| 15 minutes | 6 hours | 1 cheesecake |
Final Thoughts On Our Delicious Fresh Cherry Keebler No-Bake Cheesecake
We hope that you have enjoyed this Keebler no-bake cheesecake recipe as much as we did. It’s a fun unique take on cheesecake that we just had to give a try!
And don’t forget to let us know how it came out in the comments below!
4-Step Easy Keebler No-Bake Cheesecake With Fresh Cherries
Equipment
- 10-inch springform cake pan
- Measuring cups and spoons
- Mixing bowls
- Blender
- Strainer or sieve, fine-meshed
- Electric or hand mixer
- Rubber or silicone spatula
- Plastic or saran wrap
Ingredients
- 1 Keebler Ready Crust, Graham Crackers
- 2 pounds of fresh cherries, pitted and roughly chopped
- 8 ounces full-fat cream cheese, softened at room temperature
- 1/2 cup caster sugar
- 8 ounces Cool Whip, softened at room temperature
- 1/2 teaspoon vanilla extract
- Whipped cream, for garnish
- Fresh whole cherries, for garnish
Instructions
- Prepare the equipment and crustFirst, place the Keebler pie crust inside the fridge. If it was frozen, make sure it is completely thawed.You should also ensure that all of the ingredients are completely softened to room temperature. This helps them create a much smoother lump-free cheesecake batter.1 Keebler Ready Crust, Graham Crackers
- Make the cherry fillingMake sure that all of the cherries are washed, pitted, and roughly chopped. Set aside about 1 3/4 cups of chopped cherries.The rest of the chopped cherries can be placed inside a blender for a couple of seconds. Once the cherries are completely pureed.Strain the blended cherry liquid and press it to extract as much pure cherry juice as you can. Discard any leftover fibers in the sieve. Set the fresh cherry juice aside until needed.2 pounds of fresh cherries, pitted and roughly chopped
- Make the vanilla cheesecake batterPlace the softened cream cheese inside a large mixing bowl. Then, beat it until it is completely smooth in texture.Then, add the caster sugar and keep beating the cream cheese. This will take about 4-5 minutes at medium-high speed to help dissolve the sugar.Then, by hand, whisk in the cherry juice you just made. If you use an electric blender, the mixture may separate or cause a big mess. Once the cherry juice has been added, add the chopped cherries, Cool Whip, and vanilla extract.Fold in the remaining ingredients until you have a completely smooth and uniform batter for your Keebler no-bake cheesecake.8 ounces full-fat cream cheese, softened at room temperature, 1/2 cup caster sugar, 8 ounces Cool Whip, softened at room temperature, 1/2 teaspoon vanilla extract
- Assemble and set the cheesecakeFinally, gently pour the cherry cheesecake batter into your Keebler no-bake pie crust. Smooth out the top and ensure there are no big air pockets.Wrap the entire cheesecake in plastic or saran wrap. Then, place it inside the fridge and allow it to set for at least 6 hours. We always recommend that you leave it to set overnight (about 8-10 hours).
- Garnish the cherry-flavored Keebler no-bake cheesecakeOnce your cherry cheesecake has completely set inside the fridge, you can remove it. Take it out of the aluminum foil crust container if you want to and place it on a cake stand.And lastly, garnish the cherry cheesecake with freshly whipped dollops of piped whipped cream and fresh cherries.Serve immediately or store in an airtight container for 4-5 days.Whipped cream, for garnish, Fresh whole cherries, for garnish
Notes

Lindy Van Schalkwyk is a culinary specialist with a background in Advanced Cooking, Advanced Pâtisserie, Media Communications and Nutrition. She has gained invaluable experience in the culinary industry having worked in some of the top restaurants in Africa in 2016 and 2017. Her expertise in nutrition has enabled her to develop recipes for special dietary needs. In 2018, Lindy began working in the Food Media industry, focusing on recipe development, recipe writing, food writing and food styling.


