By Lindy Van Schalkwyk, last updated on October 3, 2024
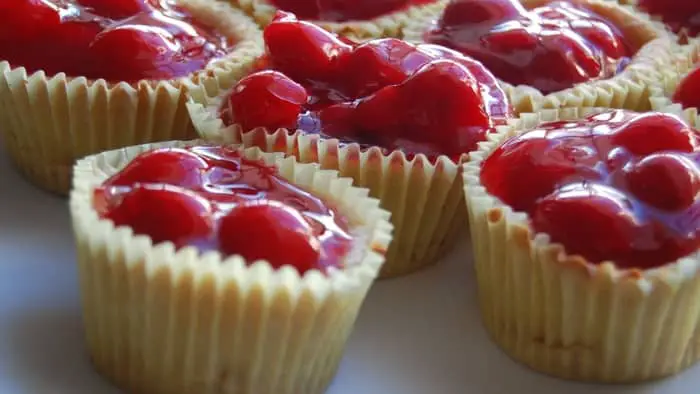
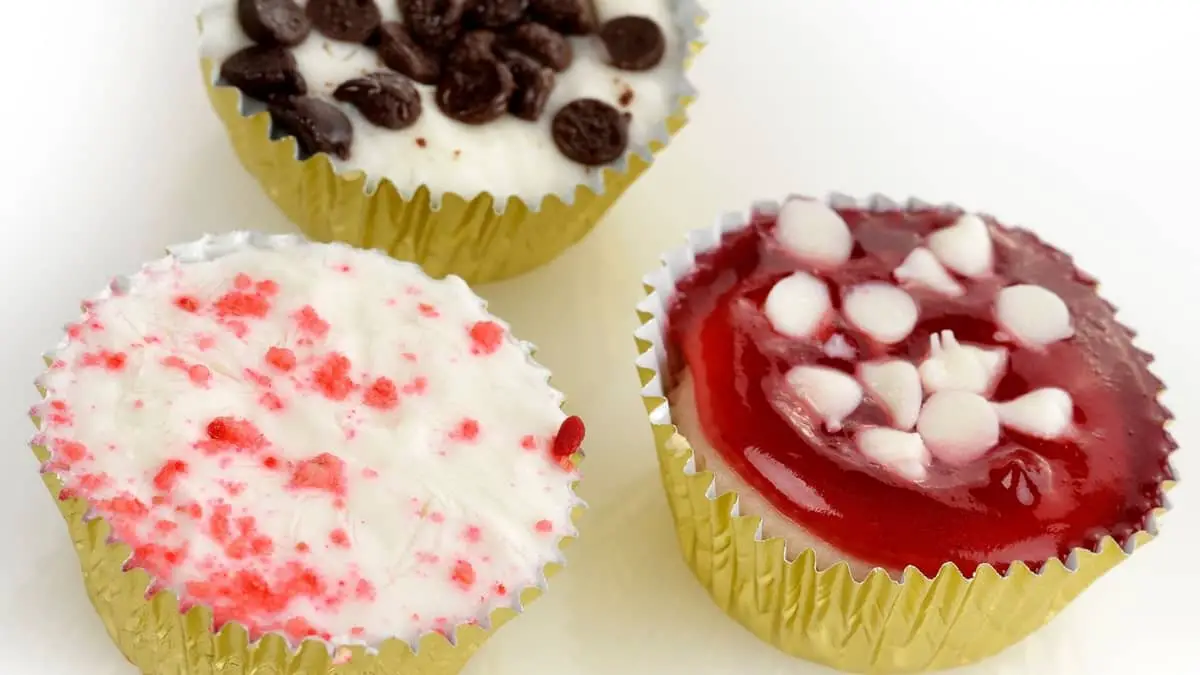
These easy vanilla wafer cheesecake cups are packed with delicious flavors! You can serve it for dessert, Sunday tea, or even at a birthday party.
What Are Vanilla Wafer Cheesecake Cups?
These threats consist of three main elements. A delicious vanilla wafer crust that is easy to make and doesn’t need to be pre-baked or set. It helps add texture and a fantastic buttery richness to every bite.
Then, you have the super creamy no-bake cheesecake cups. You can also call them cheesecake cupcakes if you’d like. They are easy to assemble and simply need some time to set in the fridge before being served. What we love the most about this recipe is that it has an excellent balance of tanginess and sweetness thanks to the lemon juice and sour cream.
And finally, we top these cups off with a sweet and tangy homemade fresh berry sauce and some whipped cream.
Overall, these no-bake mini cheesecakes with vanilla wafers are a fantastic dessert idea for any occasion.
What You Will Need To Make Cheesecake Cupcakes With Vanilla Wafers

Ingredients for the vanilla wafers crust
- 1 3/4 cups vanilla wafer cookies, roughly crushed
- 1/4 cup brown granulated sugar
- 1/2 cup salted butter, melted
Ingredients for the cream cheese cupcakes
- 16-ounces full-fat cream cheese softened at room temperature
- 1/4 cup caster sugar
- 3 tablespoons sour cream, room temperature
- 1 teaspoon vanilla extract
- 1 teaspoon lemon juice
- 1 cup heavy whipping cream, room temperature
Ingredients for the berry sauce and garnish
- 2 cups fresh mixed berries, washed and cleaned
- 1/4 cup water
- 2 tablespoons fine caster sugar
- 1 tablespoon corn starch + 1 tablespoon water
- 1 cup whipped cream
Equipment
- Measuring cups and spoons
- Food processor
- Cupcake pan (or muffin pan)
- Cupcake liners
- Mixing bowls
- Electric hand or stand mixer
- Rubber or silicone spatula
- Medium saucepan
Step-by-step instructions to make these cream cheese cupcakes with vanilla wafers
Step 1: Make the vanilla wafers crust for cheesecake
To make this crust, combine all of the ingredients into a food processor. Then, blend it until you have a uniform fine crumb.
Then, press the fine crumb into your lined cupcake molds. Only make the crust about 1/4-inch thick. Make sure that the crumbs are tightly packed and will hold their shape once the butter has set again. Set these aside until needed.
Step 2: Make the cream cheese cheesecake batter
First, place the softened cream cheese into a large mixing bowl. Beat it until it becomes fluffy and aerated. Then, add the sugar and continue beating the mixture for about 3-4 minutes. Your sugar should completely dissolve.
Next, mix in your sour cream, lemon juice, and vanilla extract. Once these ingredients have been properly mixed, set them aside.
In a separate mixing bowl, add your heavy cream and start beating it. Continue until your cream has reached stiff peaks.
Finally, fold your whipped cream into the cheesecake base. First, start by roughly mixing in a third. Then, follow more gently with another third. And finally, using extreme care, fold in the remaining third of whipped cream.
Step 3: Set your vanilla wafer cheesecake cups
Once your batter has been made, divide it into cupcake molds. Do not overfill the cupcake liners. Then, wrap the entire pan in plastic or saran wrap and place it inside the fridge.
Allow the cupcakes to set for at least 4 hours, but preferably overnight.
Step 4: Make the berry sauce
To make this berry sauce, simply combine the fresh berries, water, and caster sugar in a medium saucepan. Bring the mixture to a boil while stirring often.
Once it boils, reduces the heat and allows it to simmer for 5 minutes or until the fruit becomes soft. While the fruit is simmering, combine the corn starch and water until it makes a smooth slurry.
Add the slurry to the berry mixture and continue simmering it until it thickens about 3-4 minutes. Once completely cooked, allow the sauce to cool in the fridge.
Step 5: Assemble the vanilla wafer cheesecake cups
To assemble these delicious treats, remove each cheesecake cup from the cupcake pan. Then, first, garnish it with some whipped cream (which you can also make from scratch). And finally, top the cream with your homemade berry sauce and serve immediately.
Tips And Tricks For Making These Vanilla Wafer Cheesecake Cups
- Do not use a blender to make the vanilla wafer crust. It will completely pulverize the mixture into a fine powder, which isn’t what you want. You want your crust to still have some texture. If you don’t have a food processor, you can also crush the cookies inside a plastic zip-lock bag until it forms a fine crumb. Then, simply combine it with the remaining ingredients and mix it well.
- Make sure that all of your ingredients are at room temperature. It makes it a lot easier to incorporate into each other. And, it prevents over mixing, which could deflate the batter and make a stiff product.
- You have to whip your heavy cream until it reaches stiff peaks. Medium peaks will not create a firm enough batter and will be floppy. You can look at this fantastic video that will show you how to beat cream to stiff peaks.
- You can also make bite-sized cheesecake cupcakes by simply using a mini cupcake pan. You can have a look online for these specialized cupcake pans.
- While this berry sauce is delicious when warm, it should be served cold with these vanilla wafer cheesecake cups. Otherwise, it will immediately melt them and even cause them to excrete water. So, allow it to completely cool at room temperature before garnishing with it.
- To store your assembled vanilla wafer cheesecake cups, it is best to leave the garnishes off until right before you serve them. Otherwise, the cream will eventually separate and deflate. So, to store them, place them inside an airtight container and keep them in the fridge for as long as possible. These no-bake cheesecake cups will last about 3-4 days if kept properly.
Preparation Times And Servings For This Vanilla Wafer Cheesecake Cups Recipe

Final Thoughts – Delicious Vanilla Wafer Cheesecake Cups
If these tasty treats can’t make you drool, then we don’t know what will! Let us know what you think about this recipe in the comments below, or if you have any other questions about it.
Read more about Easy Ramekin Cheesecake Recipe – Made In Under 1 Hour
Cheesecake Cupcakes With Vanilla Wafers
Equipment
- Measuring cups and spoons
- Food processor
- Cupcake pan (or muffin pan)
- Cupcake liners
- Mixing bowls
- Electric hand or stand mixer
- Rubber or silicone spatula
- Medium saucepan
Ingredients
For the vanilla wafers crust
- 1 3/4 cups vanilla wafer cookies, roughly crushed
- 1/4 cup brown granulated sugar
- 1/2 cups salted butter, melted
For the cream cheese cupcakes
- 16 oz full-fat cream cheese softened at room temperature
- 1/4 cup caster sugar
- 3 tbsp sour cream, room temperature
- 1 tsp vanilla extract
- 1 tsp lemon juice
- 1 cup heavy whipping cream, room temperature
For the berry sauce and garnish
- 2 cups fresh mixed berries, washed and cleaned
- 1/4 cup water
- 2 tbsp fine caster sugar
- 1 tbsp corn starch + 1 tablespoon water
- 1 cup whipped cream
Instructions
- To make this crust, combine all of the ingredients into a food processor. Then, blend it until you have a uniform fine crumb.Then, press the fine crumb into your lined cupcake molds. Only make the crust about 1/4-inch thick. Make sure that the crumbs are tightly packed and will hold their shape once the butter has set again. Set these aside until needed.
- First, place the softened cream cheese into a large mixing bowl. Beat it until it becomes fluffy and aerated. Then, add the sugar and continue beating the mixture for about 3-4 minutes. Your sugar should completely dissolve.Next, mix in your sour cream, lemon juice, and vanilla extract. Once these ingredients have been properly mixed, set them aside.In a separate mixing bowl, add your heavy cream and start beating it. Continue until your cream has reached stiff peaks.Finally, fold your whipped cream into the cheesecake base. First, start by roughly mixing in a third. Then, follow more gently with another third. And finally, using extreme care, fold in the remaining third of whipped cream.
- Once your batter has been made, divide it into cupcake molds. Do not overfill the cupcake liners. Then, wrap the entire pan in plastic or saran wrap and place it inside the fridge.Allow the cupcakes to set for at least 4 hours, but preferably overnight.
- To make this berry sauce, simply combine the fresh berries, water, and caster sugar in a medium saucepan. Bring the mixture to a boil while stirring often.Once it boils, reduces the heat and allows it to simmer for 5 minutes or until the fruit becomes soft. While the fruit is simmering, combine the corn starch and water until it makes a smooth slurry.Add the slurry to the berry mixture and continue simmering it until it thickens about 3-4 minutes. Once completely cooked, allow the sauce to cool in the fridge.
- To assemble these delicious treats, remove each cheesecake cup from the cupcake pan. Then, first, garnish it with some whipped cream (which you can also make from scratch). And finally, top the cream with your homemade berry sauce and serve immediately.

Lindy Van Schalkwyk is a culinary specialist with a background in Advanced Cooking, Advanced Pâtisserie, Media Communications and Nutrition. She has gained invaluable experience in the culinary industry having worked in some of the top restaurants in Africa in 2016 and 2017. Her expertise in nutrition has enabled her to develop recipes for special dietary needs. In 2018, Lindy began working in the Food Media industry, focusing on recipe development, recipe writing, food writing and food styling.


