By Lindy Van Schalkwyk, last updated on August 28, 2022
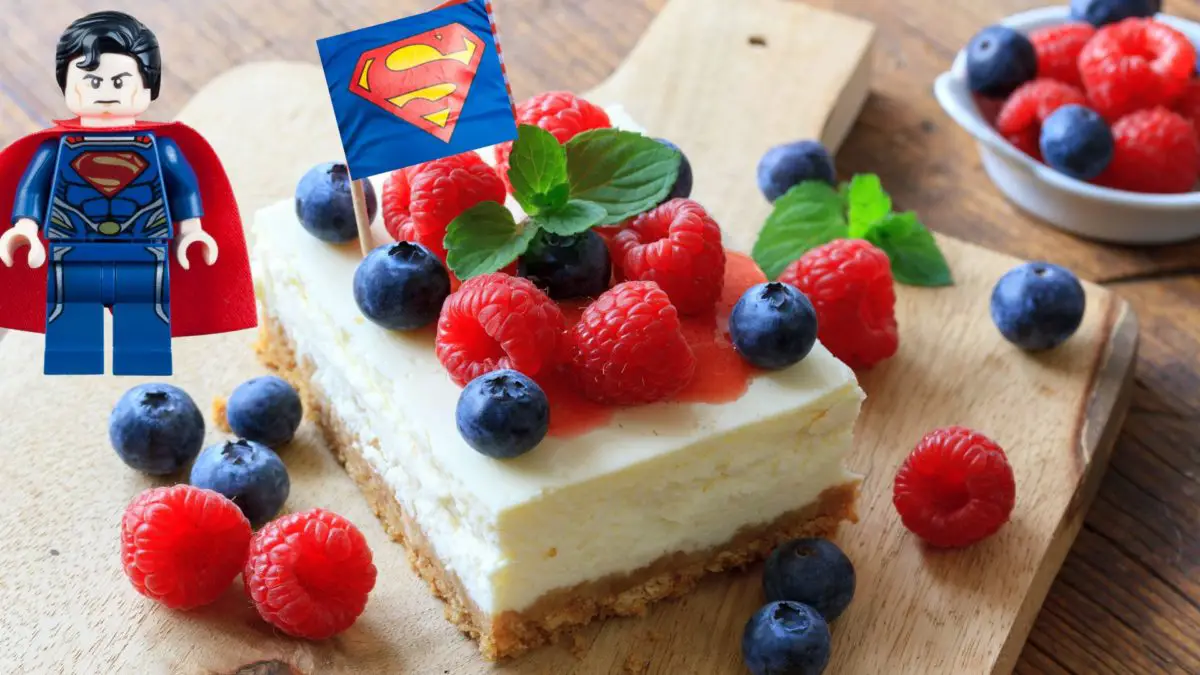
Do you know how to make a superman cheesecake? Today we’ll guide you through all of the steps to create a fun, colorful, and unique cake!
How To Make A Superman Cheesecake – What Is A Superman Cheesecake?
Before diving into how to make a superman cheesecake, you may want to figure out what exactly it is? After all, with such a unique name there are tons of creative options that come to mind!
Essentially, a superman cheesecake is made using a tie-dye effect with superman colors. This includes yellow, blue, red, and occasionally white.
The cheesecake batter itself can still be flavored however way you’d like, as long as the flavoring doesn’t affect the color of the cheesecake. For this technique, you will need a white batter (or off-white). This is the only way you can properly change the color without creating a pale or greyish one.
This cheesecake is perfect for themed birthday parties! And, if you don’t want to make it for the kids, we can guarantee that the adults won’t let it go to waste!
Our Recipe – How To Make A Superman Cheesecake
Our superman cheesecake recipe is super easy. You can even make it with any cheesecake batter you want! The technique is what is most important.
We decided to use a classic graham cracker crust and make it a little bit thicker than usual. This just adds more crunch to every bite and creates a more stable base to hold the tall cake part.
We also use a big cheesecake filling recipe to make an extra-high cake. Because most people will likely be making this superman cheesecake for some type of party, we thought we’d save you some time doing maths!
But, if you only want a standard layer of cheesecake, you can divide the recipe in half. You will also have to reduce the baking time slightly.
And finally, while it isn’t necessary, we finished off the cake with some whipped topping piped details. But, you can leave this out if you’d like.
What You Need To Make This Superman Cheesecake Recipe
Ingredients for the crust
- 2 cups graham crackers
- 1/3 cup fine caster sugar
- 8 tablespoons salted butter, melted
Ingredients for the filling
- 32 ounces full-fat cream cheese, softened at room temperature
- 9 tablespoons salted butter, softened at room temperature
- 1 1/2 cups fine caster sugar
- 2 tablespoons cornstarch
- 1 tablespoon vanilla extract
- 5 large eggs, room temperature
- 2 cups sour cream, room temperature
- Red food coloring
- Yellow food coloring
- Blue food coloring
- Whipped topping, optional for garnish
Equipment
- 10-inch springform cake pan
- Non-stick baking paper
- Non-stick cooking spray (or additional melted butter)
- Aluminum foil
- Measuring cups and spoons
- Food processor, optional
- Cooling rack
- Mixing bowls
- Electric or hand mixer
- Rubber or silicone spatula
- Butterknife
- Plastic or saran wrap
Step By Step Instructions
Step 1: Prepare your equipment
First, preheat your oven to 360ºF (180ºC).
Line a 10-inch springform cake pan with non-stick baking paper and cooking spray.
Then, make a large 14-inch band with aluminum foil. Make sure it is folded in half so that you essentially have 2 layers. Then, wrap it around the outside of the cake pan and secure it with a metal pin or paper clip.
Step 2: Make the cheesecake crust
In a food processor, pulse together the graham crackers and sugar. Then, add the melted butter and keep mixing. Your crumbs should be uniform in texture and consistency.
Then, press the crumbs into your lined cake pan. You can create a tiny lip at the bottom if you’d like. Partially bake your crust for 10-12 minutes or until it starts slightly browning.
Remove it and allow it to cool completely.
Step 3: Make the cheesecake batter
To start, beat together the cream cheese and butter until they become light and fluffy. Then, add the caster sugar, cornstarch, and vanilla extract. Keep creaming the ingredients until the sugar starts dissolving.
Next, add the large eggs one at a time. Mix the batter well between each addition and make sure to scrape down the sides of the bowl. You need a uniform batter.
Finally, whisk in the sour cream. Keep mixing until all of the ingredients have just been incorporated together.
Step 4: Color the cheesecake batter
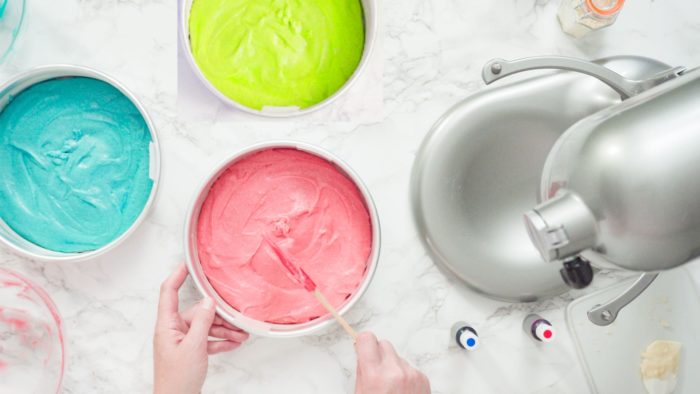
Next, divide the batter into 3 large bowls. Make the one bowl red, the second bowl yellow, and the final bowl blue.
You only have to add a few drops of color if you’re using gel. While mixing in the color, don’t overmix the batter during the process.
Step 4: Create the tie-dye effect
Add large dollops of each color into your crust-lined pan. Alternate between each and repeat the process until you don’t have any batter left.
Finally, use a butter knife gently and carefully give the batter a few swirls. This will help blend the colors without mixing them fully.
Step 5: Bake the cheesecake
Once your cheesecake is assembled, lower the oven temperature to 320ºF (160ºC). Place the cheesecake in a water bath and bake it for 90-120 minutes or until it is done.
Once it has finished baking, you can crack the oven door and turn it off. Allow the cheesecake to cool for an hour. Then, remove it and keep it at room temperature for another hour. Finally, wrap the entire cake pan with plastic wrap and allow it to set in the fridge overnight.
Once your cheesecake is set, remove it from the pan and garnish it with whipped topping.
Expert Tips And Tricks
- If you don’t know exactly how to make a water bath (also called a bain-marie) then have a look at this tutorial. It helped us a lot when we first started using this baking technique.
- You don’t have to bake the cheesecake with a water bath, but it helps prevent the surface and sides from browning too much. And, because your large cheesecake bakes for almost 2 hours, it helps retain moisture.
- If the cheesecake browns too quickly, cover the top with some aluminum foil. It will allow the cheesecake to continue baking without burning.
Preparations Times And Servings

Wrapping Things Up
As you can see, making this fun superman cheesecake isn’t as difficult to make as you may have initially thought.
Our steps in this article on how to make a superman cheesecake help easily explain how and why we use certain techniques. Ultimately, you can learn as you go, which is always the best when it comes to baking!
If you enjoyed this fun cheesecake recipe, make sure to go have a look at our site for others!
FAQs
How To Make A Superman Cheesecake - Easy Guided Tutorial
Equipment
- 10-inch springform cake pan
- Non-stick baking paper
- Non-stick cooking spray (or additional melted butter)
- Aluminum foil
- Measuring cups and spoons
- Food processor, optional
- Cooling rack
- Mixing bowls
- Electric or hand mixer
- Rubber or silicone spatula
- Butterknife
- Plastic or saran wrap
Ingredients
Ingredients for the crust
- 2 cups graham crackers
- 1/3 cup fine caster sugar
- 8 tablespoons salted butter,melted
Ingredients for the filling
- 32 ounces full-fat cream cheese, softened at room temperature
- 9 tablespoons salted butter, softened at room temperature
- 1 1/2 cups fine caster sugar
- 2 tablespoons cornstarch
- 1 tablespoon vanilla extract
- 5 large eggs, room temperature
- 2 cups sour cream, room temperature
- Red food coloring
- Yellow food coloring
- Blue food coloring
- Whipped topping, optional for garnish
Instructions
- Prepare your equipmentFirst, preheat your oven to 360ºF (180ºC).Line a 10-inch springform cake pan with non-stick baking paper and cooking spray.Then, make a large 14-inch band with aluminum foil. Make sure it is folded in half so that you essentially have 2 layers. Then, wrap it around the outside of the cake pan and secure it with a metal pin or paper clip.
- Make the cheesecake crustIn a food processor, pulse together the graham crackers and sugar. Then, add the melted butter and keep mixing. Your crumbs should be uniform in texture and consistency.Then, press the crumbs into your lined cake pan. You can create a tiny lip at the bottom if you'd like. Partially bake your crust for 10-12 minutes or until it starts slightly browning.Remove it and allow it to cool completely.2 cups graham crackers, 1/3 cup fine caster sugar, 8 tablespoons salted butter,melted
- Make the cheesecake batterTo start, beat together the cream cheese and butter until they become light and fluffy. Then, add the caster sugar, cornstarch, and vanilla extract. Keep creaming the ingredients until the sugar starts dissolving.Next, add the large eggs one at a time. Mix the batter well between each addition and make sure to scrape down the sides of the bowl. You need a uniform batter.Finally, whisk in the sour cream. Keep mixing until all of the ingredients have just been incorporated together.32 ounces full-fat cream cheese, softened at room temperature, 9 tablespoons salted butter, softened at room temperature, 1 1/2 cups fine caster sugar, 2 tablespoons cornstarch, 1 tablespoon vanilla extract, 5 large eggs, room temperature, 2 cups sour cream, room temperature
- Color the cheesecake batterNext, divide the batter into 3 large bowls. Make the one bowl red, the second bowl yellow, and the final bowl blue.You only have to add a few drops of color if you're using gel. While mixing in the color, don't overmix the batter during the process.Red food coloring, Yellow food coloring, Blue food coloring
- Create the tie-dye effectAdd large dollops of each color into your crust-lined pan. Alternate between each and repeat the process until you don't have any batter left.Finally, use a butter knife gently and carefully give the batter a few swirls. This will help blend the colors without mixing them fully.
- Bake the cheesecakeOnce your cheesecake is assembled, lower the oven temperature to 320ºF (160ºC). Place the cheesecake in a water bath and bake it for 90-120 minutes or until it is done.Once it has finished baking, you can crack the oven door and turn it off. Allow the cheesecake to cool for an hour. Then, remove it and keep it at room temperature for another hour. Finally, wrap the entire cake pan with plastic wrap and allow it to set in the fridge overnight.Once your cheesecake is set, remove it from the pan and garnish it with whipped topping.Whipped topping, optional for garnish
Notes

Lindy Van Schalkwyk is a culinary specialist with a background in Advanced Cooking, Advanced Pâtisserie, Media Communications and Nutrition. She has gained invaluable experience in the culinary industry having worked in some of the top restaurants in Africa in 2016 and 2017. Her expertise in nutrition has enabled her to develop recipes for special dietary needs. In 2018, Lindy began working in the Food Media industry, focusing on recipe development, recipe writing, food writing and food styling.


