By Griselda M., last updated on November 29, 2021
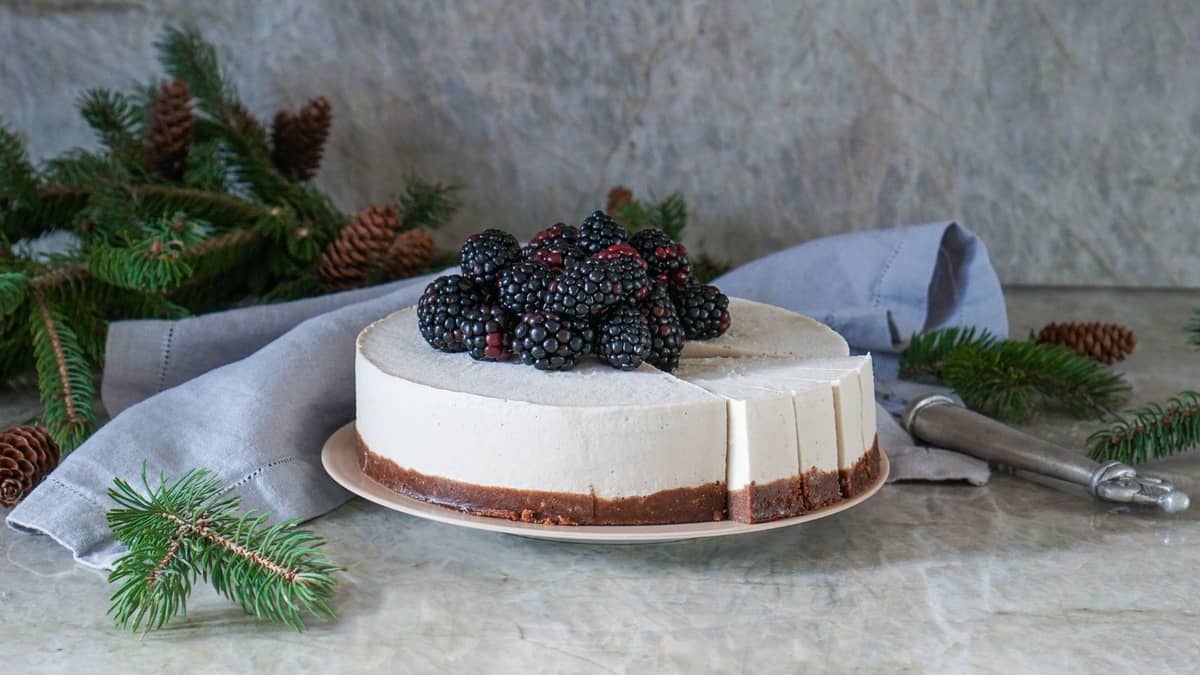
The ultimate gluten-free cheesecake NYC is here! You won’t believe how delicious this recipe is. And if you don’t, then keep reading.
We can’t deny that unfortunately, nowadays we are dealing with a wave of deficits that we didn’t have before. Some foods didn’t use to irritate our stomachs like today, as is the case with gluten intolerance.
This recipe is dedicated to all of our cheesecake lovers out there that cannot eat foods that contain gluten. And of course, for those who would like to try a different cheesecake. I’m absolutely sure you will love this gluten-free cheesecake!
What Is Gluten?
Gluten is a protein present in some cereals such as wheat, barley, rye, spelt, Kamut, triticale (a hybrid of wheat and barley), and possibly, oats. Gluten is the ingredient that gives firmness and elasticity to flour, producing fluffy bread and firm doughs.
So, unfortunately, there are people who are gluten intolerant. This disease has been called Celiac disease or gluten intolerance. In fact, the prevalence of celiac disease is estimated at 1 celiac per 100 inhabitants.
We have important information in the next paragraph, and also, we’ll tell you what foods are gluten-free.
Gluten Intolerance – Celiac Disease
Gluten intolerance or celiac disease is a relatively common and permanent disease. Certainly occurring in genetically predisposed individuals, characterized by an inflammatory reaction. Therefore, celiacs cannot eat any food that has been prepared with flours, starches, semolina, or any other of its derivatives.
The intake of small amounts of gluten is highly harmful to the celiac and therefore, he needs to follow a
strict gluten-free regimen for life. It is also very important to keep in mind that it’s crucial to avoid cross-contamination.
Gluten-Free Cereals and Derivates
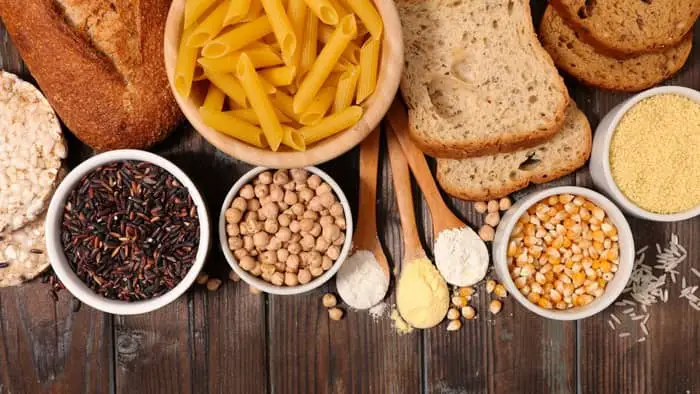
This is a list of some gluten-free cereals and derivates:
- Rice
- Corn
- Buckwheat
- Millet
- Sorghum
- Teff
- Quinoa
- Amaranth
- Sesame
Also, suitable flours for celiacs that are labeled as such, as well as bread, pasta, biscuits, and pastry products made with special gluten-free flours.
And now comes the ultimate gluten-free NYC cheesecake recipe that you were looking for! Get ready, because it is made with a delicious ingredient. Yes, our lovely Amaranth.
The Ultimate Gluten-Free Cheesecake NYC Recipe
This gluten-free New York cheesecake is absolutely amazing! It has almost every ingredient from the original NY cheesecake except for its base. Its base is 100% gluten-free!
That’s right! I am confident that this would be the best gluten-free cheesecake you’ll ever try. Its base doesn’t contain gluten or ingredients made with gluten-free foods.
And the best part of it is the fact that being a gluten-free cheesecake does not change its creamy texture and dense flavor at all! In fact, its base made from amaranth will give it a unique and irresistible flavor!
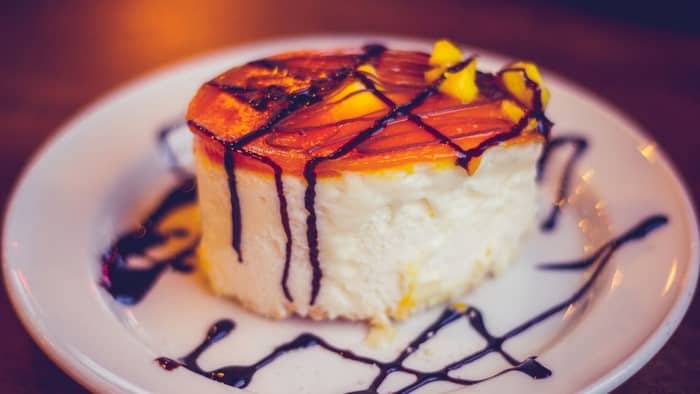
Gluten-Free New York Cheesecake
Ingredients for the crust
- 2 cups of natural amaranth
- 90 g of melted butter
- 2 tbsp of sugar
Ingredients for the filling
- 600 g of cream cheese -at room temperature
- 1 cup of sugar
- 4 medium-size eggs -at room temperature-
- 1 cup of sour cream
- 1/2 cup of heavy cream
- 1 tbsp of vanilla extract
- 1 tbsp of lemon juice
Step-by-Step instructions for the crust
Step #1: Mix
In a large bowl put the two cups of amaranth and sugar. Once you have this, melt the butter in the microwave. Then, pour the melted butter into the sweetened amaranth using a spoon to mix until everything is incorporated.
Step #2: Prepare your base
Grease your springform, including the ring walls, and pour your crust mixture onto the base of your springform. Use your fingers to press and spread the mixture evenly.
Step #3: Wrap it up
Make sure to line the springform pan with aluminum foil. Since we are using a water bath and we don’t want it to leak. Then, once is ready, set it aside.
Step-by-Step instructions for the cheesecake filling
Step #1: Preheat the oven
Preheat the oven to 150 degrees Celsius.
Step #2: Mix
Meanwhile, get your electric mixer bowl and put your cream cheese and sugar. Then, mix until light and smooth. Next, pour the sour cream, heavy cream, vanilla extract, and lemon juice, and mix until well combined.
After that, you will add the eggs to the mixture. This has to be one at a time and at low speed.
Step #3: Build a water bath
In a deep tray, pour some water to build your bain-marie. The aluminum foil will ensure that no water leaks into your cheesecake.
Step #4: Pour and bake
Pour your cream cheese mixture onto your crust, put it in the bain-marie, and bake for 1 hour and 45 minutes.
Step #5: Let it cool
Once the time has passed, turn off the oven, open the door slightly, and let your cheesecake cool inside for about 30 minutes to an hour. Then, remove the cheesecake from the oven and let it cool completely at room temperature.
Step #6: Let it sit
Once completely cool, put it in the fridge for at least 4 hours. My suggestion is that you make it the day before so you can leave it overnight in the fridge until it sits. Doing it overnight will give it an ultimate perfect texture.
Step #7: Garnish
You can now unmold it and decorate it with some jam and fresh fruit or one of your favorite toppings.
Step #8: Slice, serve and enjoy
Use a sharp knife to slice your cheesecake, but make sure you soak your knife in water every time you slice it. This way you will have a clean and beautiful cheesecake slice.
Final Words
Encourage yourself to make this cake so simple and easy. I do it whenever I have guests because I know that the New York Cheesecake is a guaranteed success. It has a soft, dense, and creamy consistency.
Having chosen amaranth to make this recipe has been fantastic. This fabulous ingredient gave it a touch of deliciousness that you have to try. It is definitely a real delight!
I hope you make this gluten-free New York cheesecake so you can fully enjoy it with your loved ones. And if you do, don’t forget to share your comments with us.
Enjoy!
The Ultimate Gluten-Free Cheesecake NYC
Ingredients
Ingredients for the crust
- 2 cups of natural amaranth
- 90 g of melted butter
- 2 tbsp of sugar
Ingredients for the filling
- 600 g of cream cheese -at room temperature
- 1 cup of sugar
- 4 medium-size eggs -at room temperature-
- 1 cup of sour cream
- 1/2 cup of heavy cream
- 1 tbsp of vanilla extract
- 1 tbsp of lemon juice
Instructions
- In a large bowl put the two cups of amaranth and sugar. Once you have this, melt the butter in the microwave. Then, pour the melted butter into the sweetened amaranth using a spoon to mix until everything is incorporated.
- Grease your springform, including the ring walls, and pour your crust mixture onto the base of your springform. Use your fingers to press and spread the mixture evenly.
- Make sure to line the springform pan with aluminum foil. Since we are using a water bath and we don't want it to leak. Then, once is ready, set it aside.
Step-by-Step instructions for the cheesecake filling
- Preheat the oven to 150 degrees Celsius.
- Meanwhile, get your electric mixer bowl and put your cream cheese and sugar. Then, mix until light and smooth. Next, pour the sour cream, heavy cream, vanilla extract, and lemon juice, and mix until well combined.
- After that, you will add the eggs to the mixture. This has to be one at a time and at low speed.
- In a deep tray, pour some water to build your bain-marie. The aluminum foil will ensure that no water leaks into your cheesecake.
- Pour your cream cheese mixture onto your crust, put it in the bain-marie, and bake for 1 hour and 45 minutes.
- Once the time has passed, turn off the oven, open the door slightly, and let your cheesecake cool inside for about 30 minutes to an hour. Then, remove the cheesecake from the oven and let it cool completely at room temperature.
- Once completely cool, put it in the fridge for at least 4 hours. My suggestion is that you make it the day before so you can leave it overnight in the fridge until it sits. Doing it overnight will give it an ultimate perfect texture.
- You can now unmold it and decorate it with some jam and fresh fruit or one of your favorite toppings.
- Use a sharp knife to slice your cheesecake, but make sure you soak your knife in water every time you slice it. This way you will have a clean and beautiful cheesecake slice.
Notes
Griselda is an experienced pastry chef and baker with a passion for creating delicious desserts. She has been cooking and baking for over ten years and loves the creative process of creating something special for her friends, family, and customers. Griselda has a special talent for creating beautiful and tasty desserts like cakes, pies, and cookies. She is experienced in a variety of baking techniques and loves to experiment with new flavors and textures. When Griselda isn‘t in the kitchen, she loves to spend time with her friends, family, and her two cats.
