By Griselda M., last updated on May 19, 2022
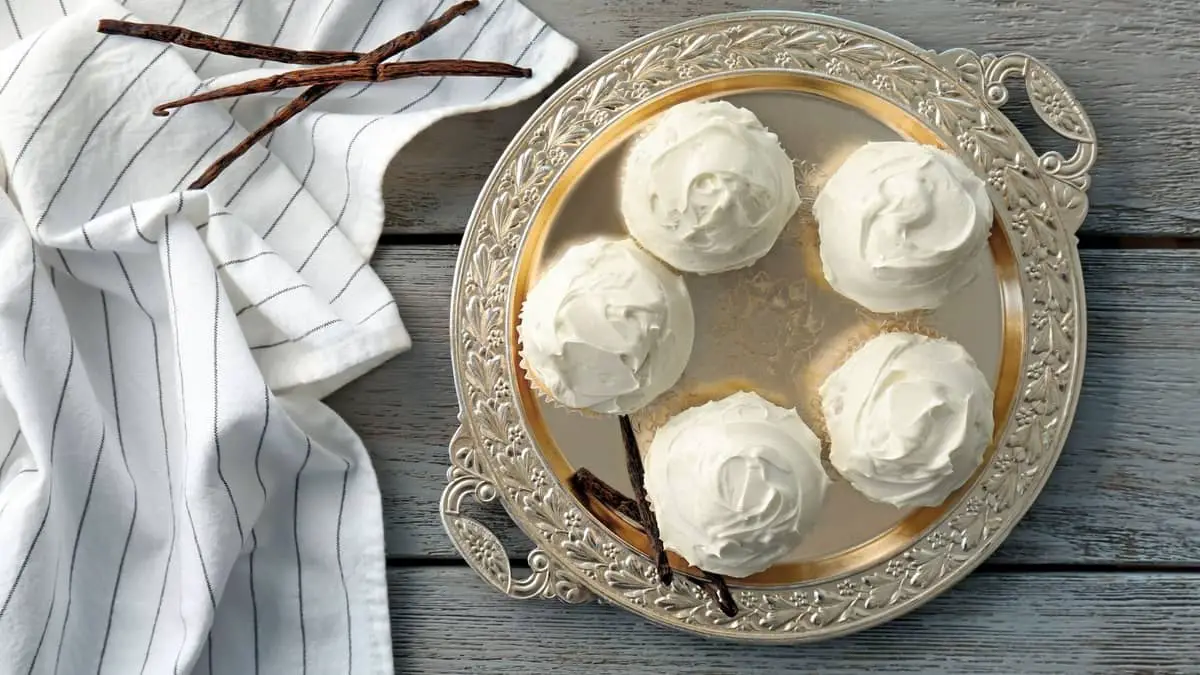
What’s more delicious than some vanilla wafer cheesecake cupcakes? Two tasty delights combined to create a beautiful and creamy dessert. This is one of my favorite cheesecake cupcakes recipes ever, and I’m about to share it with you.
Continue reading and you’ll find some interesting information and tasty facts about this mixture.
You know what?… I’ll give you both recipes. In case you prefer to make the homemade vanilla wafers at home. So take advantage, I am in a good mood!
Vanilla Wafer Cheesecake Cupcakes
If vanilla wafers are our protagonists, we owe them a proper introduction.
Vanilla Wafers
Recognized for being the classic vanilla cookies and commercially known as the popular Nilla Wafers. Considered to be in the five best-selling cookie brands. These are the cookies that melt in everyone’s mouth and the reason is that their texture is light, crispy, buttery, and vanilla-flavored.
This brand is owned by Nabisco, the name is a shortened version of Vanilla. -Oh… now I get it!-. The original recipe was made with flour, sugar, shortening, eggs, and original vanilla pods. Gustav A. Mayer created it and sold it to Nabisco in 1898.
If you’re planning on baking your own vanilla wafers, let me tell you they’re also very easy to make and I really think they’re so much better than Nillas or any other store-bought version. But if you’re in a hurry, or you don’t have an oven, or if you’re just simply not in the mood of baking, I’m sure you’ll find Nillas at any supermarket or your nearest baking store.
Above all, these trendy cupcakes are perfect for a baby shower, a wedding, at Christmas, or another family or friends reunion. The upcoming recipe will make a big difference in your cheesecake cupcakes.
Making Homemade Vanilla Wafers
Either by hand or in a mixer, we just need to make sure all of the ingredients are combined well. Let’s begin!

Ingredients you’ll need:
- 1 1/2 cups of flour -all-purpose-
- 1/2 tablespoon of baking powder -avoid using baking soda-
- a pinch of salt
- 1/2 bar of unsalted butter -at room temperature-
- 3/4 cup of powdered sugar
- 1 large egg -at room temperate-
- 2 teaspoons of vanilla extract -or 1 fresh vanilla pod-
- 1 tablespoon of whole milk
Step-by-Step
Step #1: Sift the powders
Take a large bowl and sift the flour, the baking powder, and the pinch of salt. Then combine well.
Step #2: Soft the butter with sugar
Using an electric mixer, soften the butter -at room temperature- and incorporate the sugar. Keep mixing until fluffy and pale-colored. This will ensure not getting lumps or clumps.
Step #3: Complete the mixture
Keep the mixer running at the lowest level and add the egg through the bowl’s wall. Once this gets incorporated, add the vanilla extract and the milk. Get this mixture going on until really smooth. Remember; the smoother, the better.
Step #4: Refrigerate the batter
Pour your batter into a small bowl and cover it with plastic film. Get it in the fridge for about 30 minutes.
Step #5: Prepare the oven
Meanwhile, preheat the oven to 180 degrees Celcius.
Step #6: Baking time
Take a dessert or ice cream spoon and scoop the mixture onto the baking sheet along with parchment paper. Leave a gap between them so they can have enough room to expand themselves -about 1 inch apart-. Place the sheet into the oven and bake for 15 minutes.
Remove the baking sheet from the oven once the edges turn golden brown and the center light-colored. Let them cool for 10 minutes and transfer to another recipe. Make sure to cool them up for another 15 minutes before you can eat them.
Step #7: Ready to eat!
Serve with your favorite dessert or in the morning with a cup of coffee.
Mini Cheesecakes with Vanilla Wafers
This recipe is super easy to make. Now that you have your baked vanilla wafer cookies -or a store-bought bag of cookies-, get ready for the mini cheesecake cupcakes with vanilla wafers crumble base.
Ingredients:
For the Crust
- 1 cup of crumbled vanilla wafers
- 3 tablespoons of melted butter
For the Cheesecake Cupcakes Filling
- 16 oz of softened cream cheese -2 packages-
- 1/2 cup of sugar
- 1 teaspoon of vanilla extract
- 2 medium-size eggs
- vanilla wafers, caramel syrup, or whipping cream for garnish -if desired-
Step-by-Step
Step #1: Prepare the oven and the aluminum tray
Preheat the oven to 180 degrees Celcius. Get the cupcake aluminum tray and place the paper baking cup in each muffin space. Spray paper cups with cooking spray.
Step #2: Mix the base
In a small bowl, mix the vanilla wafers crumble with the melted butter, and mix well. Pour this mixture evenly into the muffin cups and slightly press down.
Step #3: Make your batter
In another bowl, mix the cream cheese, sugar, and vanilla, with a hand or electric mixer until blended. Pour the eggs -one at a time- and spoon the filling evenly into the muffin cups -about 3/4 each-.
Step #4: Time to bake!
Get the tray into the preheated oven and bake for 25 minutes.
Step #5: Let it cool
Remove the tray from the oven and let it cool for 10 minutes at room temperature. Remove your muffins from the rack and let them cool completely for about 30 minutes before you can eat them.
Step #6: Enjoy!
Garnish with whipping cream, caramel, and a vanilla wafer on top. You can also top them with more crumble if you want.
18 servings total
Final Words and Extra Tips
Vanilla wafers are underappreciated, and for being THE classic cookie we certainly owe them respect. They have been at the tables of several family generations. Therefore, we should enjoy them as they are, and bake them with honor.
Tips
- To quickly soften your cream cheese, unwrap them and place them in a small plate or bowl, get them into the microwave for about 30 seconds.
- Make sure to always wash the eggshells with soapy water to avoid Salmonella risk.
Learn more about Praline Cheesecake Recipe
Mini Cheesecakes with Vanilla Wafers
Ingredients
For the Crust
- 1 cup of crumbled vanilla wafers
- 3 tablespoons of melted butter
For the Cheesecake Cupcakes Filling
- 16 oz of softened cream cheese -2 packages-
- 1/2 cup of sugar
- 1 teaspoon of vanilla extract
- 2 medium-size eggs
- vanilla wafers, caramel syrup, or whipping cream for garnish -if desired-
Instructions
- Preheat the oven to 180 degrees Celcius. Get the cupcake aluminum tray and place the paper baking cup in each muffin space. Spray paper cups with cooking spray.
- In a small bowl, mix the vanilla wafers crumble with the melted butter, and mix well. Pour this mixture evenly into the muffin cups and slightly press down.
- In another bowl, mix the cream cheese, sugar, and vanilla, with a hand or electric mixer until blended. Pour the eggs -one at a time- and spoon the filling evenly into the muffin cups -about 3/4 each-.
- Get the tray into the preheated oven and bake for 25 minutes.
- Remove the tray from the oven and let it cool for 10 minutes at room temperature. Remove your muffins from the rack and let them cool completely for about 30 minutes before you can eat them.
- Enjoy! Garnish with whipping cream, caramel, and a vanilla wafer on top. You can also top them with more crumble if you want.
Notes
Final Words and Extra Tips
Vanilla wafers are underappreciated, and for being THE classic cookie we certainly owe them respect. They have been at the tables of several family generations. Therefore, we should enjoy them as they are, and bake them with honor.Griselda is an experienced pastry chef and baker with a passion for creating delicious desserts. She has been cooking and baking for over ten years and loves the creative process of creating something special for her friends, family, and customers. Griselda has a special talent for creating beautiful and tasty desserts like cakes, pies, and cookies. She is experienced in a variety of baking techniques and loves to experiment with new flavors and textures. When Griselda isn‘t in the kitchen, she loves to spend time with her friends, family, and her two cats.


